Create time based experiments
To add time pressure in psychology experiments or to measure procedure times in behavioral research experiments, SoPHIE provides a built-in timer functionality. By default the timer for a step is not activated, but the settings can be adjusted for every step individually.
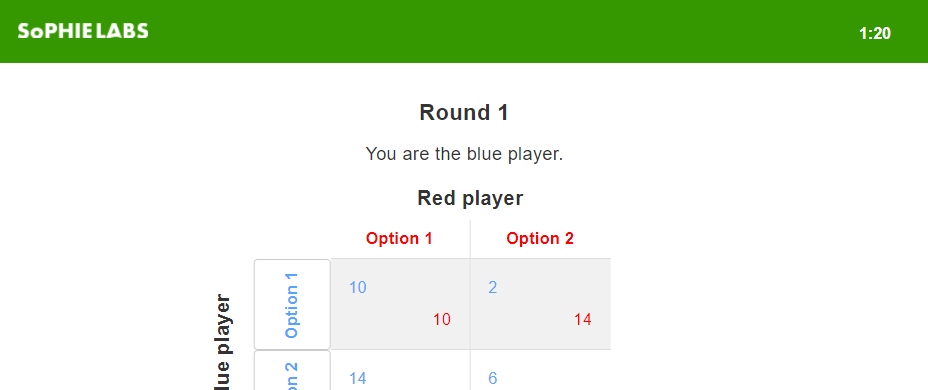
In the following screenshot you can see an example of a timer used in a prisoner’s dilemma from a participants point of view.

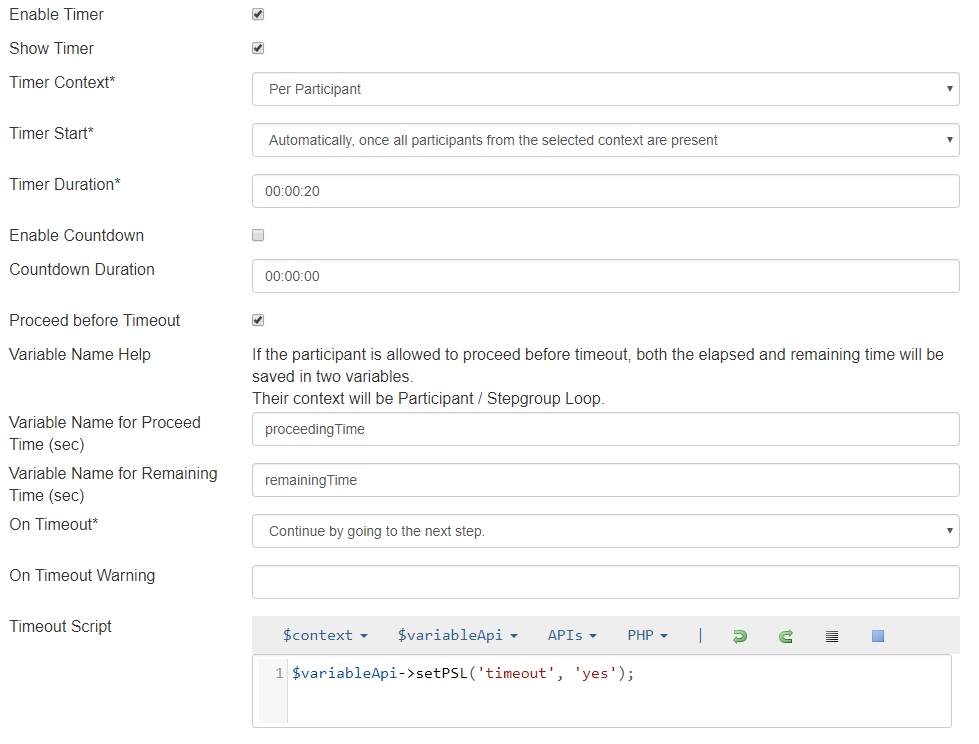
When the timer is enabled, there are several configuration options. Depending on the use case it is necessary to change the Timer Context. Thus the choice between the same timer for everyone, a group or a participant is available. The Timer Duration will be the same for every participant regardless of the context of the timer. Moreover it is possible to decide the Timer Start. If the option Manually started by the Experimenter is chosen, a clock is shown in the Monitor Tab of the Session Administration as shown on the screenshot below. Here you can decide to continue the experiment on your pace, as you may want to read some instructions for example.

In addition to a timer, a countdown can be enabled. This leads to a clock running down for the time of the Countdown Duration for all the participants of the same Timer Context. There are multiple applications for a countdown. Using a countdown reduces the influence of loading times due to bad internet connections, as the countdown is not showing the real task yet. In addition a countdown draws the attention of the participants back to the screen, if they had to wait for their partners to finish the previous tasks.
As standard, participants are not allowed to continue to the next step before the timer runs out. If they should be able to proceed earlier, the Proceed before Timeout checkbox has to be selected. In this regard it is possible to save the remaining time, as well as the time it took the participant to proceed. This can be done by entering variable names for each of these options. When the time runs out on the other hand there are two options On Timeout. The participants can either be redirected to the next step or a warning can be shown, where the timer has been before. The message that should be shown is entered in the On Timeout Warning textfield.
For group tasks over multiple rounds, where participants depend on each others answers, default values on timeout might be useful. Either this, or a variable that signals that a participant did not enter a value in time can be saved through the Timeout Script. Not only can you save variables here, but you can perform calculations as well.

Content fields for certain times like startup or countdown are used similarly to the content field of the step. The initial lag variable is used to have a delay before the step content is shown and before the timer starts. This can be used to compensate connection problems similar to the countdown and to show the same content to multiple participants at the same time. If you are having a time dependent task, the full time can be used for the actual task.
The grace period for the client as well as for the server are having the same intention. The grace period server variable allows participants to send valid inputs until the last seconds. Therefore, the value represents the time an input is accepted after the timer has ended.