General Configuration Tabs
Content
To display information, the content tab can be used. In here plain text, as well as images or videos can be shown. The input is divided into Headline and Body. The headline is already formatted to larger, bold text. In addition to that the usage of PHP code is allowed. The standard setting is html text, so PHP tags have to be used to begin with code.
CAUTION: Don’t do calculations in the content tab. As a refresh of the page would do these calculations over and over, PHP code should only be used to display variable values. Rather move your calculations to the script tab of synchronization steps.
Processing
In the processing tab it is possible to specify the Variable Name. This name is used to save the input that will be made in this steptype. Furthermore the Variable Context will be declared at this point.
Run Conditions
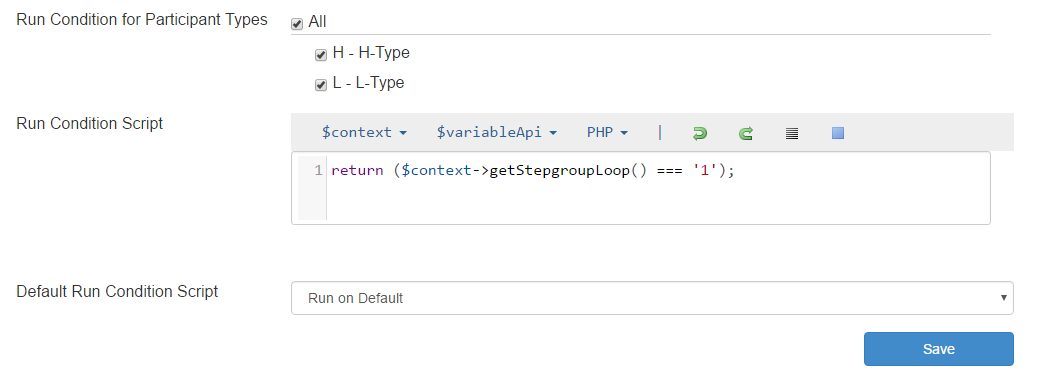
At some point it may be the intention of the experimenter to make certain steps only accessible for certain participants or Participant Types. Therefore it is feasible to exclude certain types by unchecking this type at the Run Condition for Participant Types.
The Run Condition Script on the other hand allows the experimenter to define certain conditions to decide whether a participant is going to enter the step or not. This decision is based on the return value for this script. If the return value is true, then the participant is going to enter the step. If the return value is false instead, the participant is going to skip this step and continues with the next step. The expected code in the script is PHP.

Timer
By default the timer for a step is not activated. To do so the Enable Timer checkbox has to be checked first and this is the same for Show Timer.
When the timer is enabled, there are several configuration options. Depending on the use case it is necessary to change the Timer Context. Thus there is the choice between the same timer for everyone, a group or a participant. The Timer Duration though will be the same for every participant regardless of the context of the timer. Moreover it is possible to decide the Timer Start. If the option Manually started by the Experimenter is chosen, a clock is shown in the Monitor Tab of the Session Administration, that has to be started manually.
In addition to a timer, a countdown can be enabled. This leads to a clock running down for the time of the Countdown Duration for alle the participants of the same Timer Context. This can for example be used, to let participants know that all participants reached the step and the experiment is going to continue and they have to focus again.
By default participants are not allowed to continue to the next step before the timer runs out. If the should be able to proceed earlier, the Proceed before Timeout checkbox has to be checked. In this regard it is possible to save the the remaining time, as well as the time it took the participant to proceed. This can be done by entering variable names for each of these options. When the time runs out on the other hand there are two options On Timeout. The participants can either be redirected to the next step or a warning can be shown where the timer has been before. The message that should be shown is entered in the On Timeout Warning textfield.
The following options are similar to these from the Content section. There is just an extra option to decide which content should be shown at which point.
TODO: Initial Lag, Grace Period Server, Grace Period Client
Runtime Initialization
At some point in the experiment there may be the situation, that variable values have to be decided at runtime. For example in a Trust Game, where a specific amount is given to the partner and this partner needs to decide on how much to give back. In this situation the maximum return value needs to be specified at runtime in the Form Number Input steptype. The expected code in the script is PHP.

Layout
The Layout tab represents the stylesheet for the content in the current step. Therefore CSS Code can be implemented here and it refers to the HTML elements of the Content tab.
JavaScript
Although to this point PHP has been the only scripting language necessary, JavaScript can be helpful in certain situations. As PHP is only used for all the backend processes, JavaScript is used for all realtime changes in the frontend.
There are several complex use cases, like Auctions or Chats, where JavaScript is needed. But even smaller things like displaying an image after clicking a button has to be done here.
Don’t panic though! Have a look at the JavaScript Tutorial and see that no previous knowledge in programming is necessary to understand the basics.
Internal
Steps can be referenced by their Label, to transfer participants to this step for example. The Internal tab is, where the Label and the Name can be changed.
CAUTION: No spaces are allowed within the Label! Only letters, numbers and underscores are allowed!